Sunday, October 24, 2010
FV_Voicethread Documentary
WK3&4_Reading
PE6_iWeb


The third part of my iWeb experience this week involved dividing the website by Sections and the various Art Learning Centers (theme=art careers). I also began building content. I experimented with using the iWeb widgets, including the Youtube Widget, the RSS feed, and iSight Photo. Then, I made a Facebook page, "Mrs. A's Learning Centers" to connect to the iWeb. Now, the students participating in the Learning Centers can get updated when the Learning Center iWeb site has new content if they become members of the project on Facebook. I am considering whether or not to divide the Blog into 8 Sections/Learning Centers rather than by Art level (Art I, 2, 3) as I now have it.
PE5_iWeb


Step 2 of my PE this week was actually implementing some of the new knowledge I learned from watching tutorials. I decided to start a new site that will serve as the core interaction for students to use during my ARP. Students will be using this to Blog, watch videos/audio, and follow links to other sites and activities. I tried to play with the formatting in new ways so that I am providing an organized, usable format for students to move around in. Here are some of the screenshots from my new site, as well as a clip of all me building it in Screenflow.
Thursday, October 21, 2010
PE4_iWeb


I wanted to make a website to use as the organizational hub of student interaction in my ARP. Although we have had some experience using iWeb in the program, I really wanted to dig deeper and learn some of the tools and features that I had not yet discovered. I hope to become an expert in iWeb to the degree that I would be able to demonstrate its use with my students, in case I decide to have them create their own somehow as part of my ARP down the road.
Sunday, October 17, 2010
PE3_Photoshop


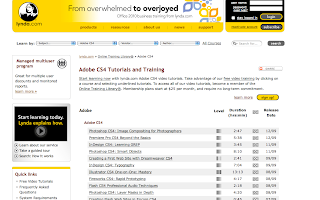
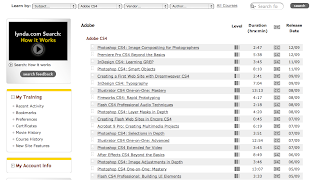
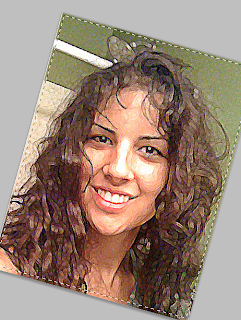
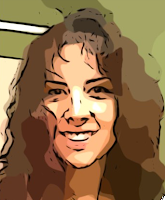
For the last stage of my endeavors with Photoshop this week, I decided to reach out to someone that I knew was really good at what I wanted to learn. I contacted Javier Antunez, who is a graphic designer/artist that I met on xBox live. He has done some amazing videos on Youtube demonstrating his skills. I watched 2 that showcase him transforming a picture of himself, and 1 about proper lighting techniques. I feel that this method of learning Photoshop was the most effective to me because he pinpoints what I find to be the most useful skills as they relate to my plans for classroom integration.
Javier Antunez Youtube Photoshop tutorial video links:
Beast in Me (speed painting)
Antunez, J. (2009, December 14). Lighting tutorial with Photoshop CS3 [Video file]. Video posted to http://www.youtube.com/watch?v=byu-CCh0FVg&playnext=1&videos=xsezAX-XsyA&feature=mfu_in_order
Pictures are original graphic designs done in Photoshop by Javier Antunez, as described by the above videos.
PE2_Photoshop
PE1_Photoshop



Thursday, October 14, 2010
BP12_OMM_Zooburst
Images from Zooburst.com. Music from Garageband.
BP9_Zooburst

I chose Zooburst for my Web 2.0 tool this week because I am interested in coming up with alternatives to present visual content. With Zooburst, you can create and manipulate digital Pop Up books. I love the extra dimension of Pop Up books in real life, so I knew I would love it online. It turned out to be very easy to use, and offers a great variety of editing options. I can see it being great as an alternative to “everyday” tools such as Keynote or Powerpoint. With Zooburst, the images actually advance towards the viewer, and occupy a space similar to a gallery in each page. Plus, each page or the entire book can be commented on, embedded, or shared.
I really liked how the background can also be changed, not just in basic color but imagery can also be added. You can make the images in the background more “fuzzed out” if you want more focus on the book pages. It could be all photographs, all 3D objects from the Zooburst library, or a mixture of both. The text could tell an actual story, or just describe the images. I thought it was a perfect format for presenting an art portfolio, so I started adding a few of my works, and put images of me in the original galleries in the background. As I watched the final results, I realized that Zooburst would be wonderful for digital storytelling, as the background, text, links, and 3D object library can really form a rich, multi layered progression of events. I think students would be highly engaged in either watching content being presented using Zooburst, or creating their own Zooburst book.Monday, October 11, 2010
Sunday, October 10, 2010
BP5_Voicethread

Voicethread is ready to go for incorporation into the instructional toolbox for my classroom. As you can see from my commercial, my first idea for its use is for classroom discussions that we have at the end of major projects called critiques. Using the same old paper templates, even though I try to mix up the formatting, gets dry after a while. If I could upload a picture of everyone’s art project beforehand, then students could use the laptops to sit down, view them all, and leave comments. At the end, we could watch the Voicethread as a class.
Another great benefit is that I could have the thread open to other sections of the same class, such as Art III first period and Art III last period. This would give them a broader scope of peer input and also make connections socially. How neat would it be to trigger a conversation with another student from a different class about his/her artwork? It could open all sorts of doors and really encourage collaboration. Parents and family members could even be easily exposed to the work going on in our class, hopefully forming a deeper understanding of what we are covering and garnering support for their children’s efforts. Maybe we could even increase attendance at the annual student art show! Besides student artwork, Voicethread could also be used to showcase and promote discussion about artists’ work in our local community, or even famous artworks from history. So many applications!
Please check out a sample of Voicethread that our group, the Technogals, created:
Monday, October 4, 2010
BP4_Shidonni_Web2.0 Tool

For my exploration of a Web 2.0 tool, I wanted to find something related to my content (art), that was also game based. Technology, entertainment, and content together have been the triple play goal of my teaching lately. Looking through some of the options, I decided to try a tool called Shidonni. What caught my eye was drawing with online tools, and that the user was creating a virtual world. Remembering how much I enjoyed anything to do with personalization and ownership of design growing up, I decided to give it a try. After a brief download, I was ready to start. The site led me right into a blank section with tools to create my first animal. I really liked the creative aspect, as there were no real restrictions on what can be created—hey, my first animal was transparent! I could see it being especially meaningful to students if I had reviewed character design and the principles of animation previous to this activity.
The color palette and tools are somewhat limited with the free version, but lines of various diameters, fill, erase, and undo are all available—with a surprising variety of results that are possible. I created my first animal: Dinolope.
I then was dropped into a blank environment, where more options are available for custom designing. One may create an outdoor landscape or an interior. I could definitely see some interior designing lessons being incorporated at this point, if somewhat limited to introductory material by the span of manipulatives. Some topics that could be covered would be perspective (horizon line, overlapping, orthogonal lines, etc), color balance/theory, and proportion. The user’s animal owns different rooms such as a bathroom, bedroom, and a kitchen that can also be customized, right down to the food in the fridge. Other animals can also be created and added to the same environment, which could offer peer collaboration options on a design project. Friends can also be asked to join in the environment from other computers and participate in activities together. How fun would it be to dip in and out of your peers’ personally designed worlds as we all sat together in the classroom? Giving feedback and even joint editing would be a great way for students’ to collaborate.
There are different floating islands that represent various worlds in Shidonni, each containing different games and activities. Drawing more characters or objects fulfills missions, unlocking more activities. Some of my favorites, played with your animals as the participants, were shoots and ladders, pong, checkers, and matching. Although the formatting was simple, that made it easy to use and understand. Shidonni would be popular with a variety of grade levels, because it is left up to the user how basic or advanced the designs are, and even at what skill level the games are played. Overall, I thought Shidonni was a clever and engaging 2.0 tool that kids (and me) could be excited about using. I picture it as a way to have some directed reward time in the classroom or as a guided design assignment with specific goals and criteria to accomplish.
Sunday, October 3, 2010
Thursday, September 30, 2010
BP1_Google Reader

Hello, and welcome to my post regarding my recent investigation of RSS feeds.

The Ponshop Blog is run by Gabriel Pons, a local artist in my area that owns and operates a gallery/studio/art school in our downtown area. Many of my students are involved in his projects, and we collaborate with his talents in our art classrooms at my school.


